แสดงบทความที่มีป้ายกำกับ Git แสดงบทความทั้งหมด

วันศุกร์ที่ 17 มีนาคม พ.ศ. 2560

9.8 Git Internals - Summary

9.8 Git Internals - Summary

Summary

You should have a pretty good understanding of what Git does in the background and, to some degree, how it’s implemented. This chapter has covered a number of plumbing commands — commands that are lower level and simpler than the porcelain commands you’ve learned about in the rest of the book. Understanding how Git works at a lower level should make it easier to understand why it’s doing what it’s doing and also to write your own tools and helping scripts to make your specific workflow work for you.
Git as a content-addressable filesystem is a very powerful tool that you can easily use as more than just a VCS. I hope you can use your newfound knowledge of Git internals to implement your own cool application of this technology and feel more comfortable using Git in more advanced ways.

9.7 Git Internals - Maintenance and Data Recovery

9.7 Git Internals - Maintenance and Data Recovery

Maintenance and Data Recovery

Occasionally, you may have to do some cleanup — make a repository more compact, clean up an imported repository, or recover lost work. This section will cover some of these scenarios.

Maintenance

Occasionally, Git automatically runs a command called "auto gc". Most of the time, this command does nothing. However, if there are too many loose objects (objects not in a packfile) or too many packfiles, Git launches a full-fledged git gc command. The gc stands for garbage collect, and the command does a number of things: it gathers up all the loose objects and places them in packfiles, it consolidates packfiles into one big packfile, and it removes objects that aren’t reachable from any commit and are a few months old.
You can run auto gc manually as follows:
$ git gc --auto
Again, this generally does nothing. You must have around 7,000 loose objects or more than 50 packfiles for Git to fire up a real gc command. You can modify these limits with the gc.auto and gc.autopacklimit config settings, respectively.
The other thing gc will do is pack up your references into a single file. Suppose your repository contains the following branches and tags:
$ find .git/refs -type f
.git/refs/heads/experiment
.git/refs/heads/master
.git/refs/tags/v1.0
.git/refs/tags/v1.1
If you run git gc, you’ll no longer have these files in the refs directory. Git will move them for the sake of efficiency into a file named .git/packed-refs that looks like this:
$ cat .git/packed-refs 
# pack-refs with: peeled 
cac0cab538b970a37ea1e769cbbde608743bc96d refs/heads/experiment
ab1afef80fac8e34258ff41fc1b867c702daa24b refs/heads/master
cac0cab538b970a37ea1e769cbbde608743bc96d refs/tags/v1.0
9585191f37f7b0fb9444f35a9bf50de191beadc2 refs/tags/v1.1
^1a410efbd13591db07496601ebc7a059dd55cfe9
If you update a reference, Git doesn’t edit this file but instead writes a new file to refs/heads. To get the appropriate SHA for a given reference, Git checks for that reference in the refs directory and then checks the packed-refs file as a fallback. However, if you can’t find a reference in the refs directory, it’s probably in your packed-refs file.
Notice the last line of the file, which begins with a ^. This means the tag directly above is an annotated tag and that line is the commit that the annotated tag points to.

Data Recovery

At some point in your Git journey, you may accidentally lose a commit. Generally, this happens because you force-delete a branch that had work on it, and it turns out you wanted the branch after all; or you hard-reset a branch, thus abandoning commits that you wanted something from. Assuming this happens, how can you get your commits back?
Here’s an example that hard-resets the master branch in your test repository to an older commit and then recovers the lost commits. First, let’s review where your repository is at this point:
$ git log --pretty=oneline
ab1afef80fac8e34258ff41fc1b867c702daa24b modified repo a bit
484a59275031909e19aadb7c92262719cfcdf19a added repo.rb
1a410efbd13591db07496601ebc7a059dd55cfe9 third commit
cac0cab538b970a37ea1e769cbbde608743bc96d second commit
fdf4fc3344e67ab068f836878b6c4951e3b15f3d first commit
Now, move the master branch back to the middle commit:
$ git reset --hard 1a410efbd13591db07496601ebc7a059dd55cfe9
HEAD is now at 1a410ef third commit
$ git log --pretty=oneline
1a410efbd13591db07496601ebc7a059dd55cfe9 third commit
cac0cab538b970a37ea1e769cbbde608743bc96d second commit
fdf4fc3344e67ab068f836878b6c4951e3b15f3d first commit
You’ve effectively lost the top two commits — you have no branch from which those commits are reachable. You need to find the latest commit SHA and then add a branch that points to it. The trick is finding that latest commit SHA — it’s not like you’ve memorized it, right?
Often, the quickest way is to use a tool called git reflog. As you’re working, Git silently records what your HEAD is every time you change it. Each time you commit or change branches, the reflog is updated. The reflog is also updated by the git update-ref command, which is another reason to use it instead of just writing the SHA value to your ref files, as we covered in the "Git References" section of this chapter earlier. You can see where you’ve been at any time by running git reflog:
$ git reflog
1a410ef HEAD@{0}: 1a410efbd13591db07496601ebc7a059dd55cfe9: updating HEAD
ab1afef HEAD@{1}: ab1afef80fac8e34258ff41fc1b867c702daa24b: updating HEAD
Here we can see the two commits that we have had checked out, however there is not much information here. To see the same information in a much more useful way, we can run git log -g, which will give you a normal log output for your reflog.
$ git log -g
commit 1a410efbd13591db07496601ebc7a059dd55cfe9
Reflog: HEAD@{0} (Scott Chacon <schacon@gmail.com>)
Reflog message: updating HEAD
Author: Scott Chacon <schacon@gmail.com>
Date:   Fri May 22 18:22:37 2009 -0700

    third commit

commit ab1afef80fac8e34258ff41fc1b867c702daa24b
Reflog: HEAD@{1} (Scott Chacon <schacon@gmail.com>)
Reflog message: updating HEAD
Author: Scott Chacon <schacon@gmail.com>
Date:   Fri May 22 18:15:24 2009 -0700

     modified repo a bit
It looks like the bottom commit is the one you lost, so you can recover it by creating a new branch at that commit. For example, you can start a branch named recover-branch at that commit (ab1afef):
$ git branch recover-branch ab1afef
$ git log --pretty=oneline recover-branch
ab1afef80fac8e34258ff41fc1b867c702daa24b modified repo a bit
484a59275031909e19aadb7c92262719cfcdf19a added repo.rb
1a410efbd13591db07496601ebc7a059dd55cfe9 third commit
cac0cab538b970a37ea1e769cbbde608743bc96d second commit
fdf4fc3344e67ab068f836878b6c4951e3b15f3d first commit
Cool — now you have a branch named recover-branch that is where your master branch used to be, making the first two commits reachable again. Next, suppose your loss was for some reason not in the reflog — you can simulate that by removing recover-branch and deleting the reflog. Now the first two commits aren’t reachable by anything:
$ git branch –D recover-branch
$ rm -Rf .git/logs/
Because the reflog data is kept in the .git/logs/ directory, you effectively have no reflog. How can you recover that commit at this point? One way is to use the git fsck utility, which checks your database for integrity. If you run it with the --full option, it shows you all objects that aren’t pointed to by another object:
$ git fsck --full
dangling blob d670460b4b4aece5915caf5c68d12f560a9fe3e4
dangling commit ab1afef80fac8e34258ff41fc1b867c702daa24b
dangling tree aea790b9a58f6cf6f2804eeac9f0abbe9631e4c9
dangling blob 7108f7ecb345ee9d0084193f147cdad4d2998293
In this case, you can see your missing commit after the dangling commit. You can recover it the same way, by adding a branch that points to that SHA.

Removing Objects

There are a lot of great things about Git, but one feature that can cause issues is the fact that a git clonedownloads the entire history of the project, including every version of every file. This is fine if the whole thing is source code, because Git is highly optimized to compress that data efficiently. However, if someone at any point in the history of your project added a single huge file, every clone for all time will be forced to download that large file, even if it was removed from the project in the very next commit. Because it’s reachable from the history, it will always be there.
This can be a huge problem when you’re converting Subversion or Perforce repositories into Git. Because you don’t download the whole history in those systems, this type of addition carries few consequences. If you did an import from another system or otherwise find that your repository is much larger than it should be, here is how you can find and remove large objects.
Be warned: this technique is destructive to your commit history. It rewrites every commit object downstream from the earliest tree you have to modify to remove a large file reference. If you do this immediately after an import, before anyone has started to base work on the commit, you’re fine — otherwise, you have to notify all contributors that they must rebase their work onto your new commits.
To demonstrate, you’ll add a large file into your test repository, remove it in the next commit, find it, and remove it permanently from the repository. First, add a large object to your history:
$ curl http://kernel.org/pub/software/scm/git/git-1.6.3.1.tar.bz2 > git.tbz2
$ git add git.tbz2
$ git commit -am 'added git tarball'
[master 6df7640] added git tarball
 1 files changed, 0 insertions(+), 0 deletions(-)
 create mode 100644 git.tbz2
Oops — you didn’t want to add a huge tarball to your project. Better get rid of it:
$ git rm git.tbz2 
rm 'git.tbz2'
$ git commit -m 'oops - removed large tarball'
[master da3f30d] oops - removed large tarball
 1 files changed, 0 insertions(+), 0 deletions(-)
 delete mode 100644 git.tbz2
Now, gc your database and see how much space you’re using:
$ git gc
Counting objects: 21, done.
Delta compression using 2 threads.
Compressing objects: 100% (16/16), done.
Writing objects: 100% (21/21), done.
Total 21 (delta 3), reused 15 (delta 1)
You can run the count-objects command to quickly see how much space you’re using:
$ git count-objects -v
count: 4
size: 16
in-pack: 21
packs: 1
size-pack: 2016
prune-packable: 0
garbage: 0
The size-pack entry is the size of your packfiles in kilobytes, so you’re using 2MB. Before the last commit, you were using closer to 2K — clearly, removing the file from the previous commit didn’t remove it from your history. Every time anyone clones this repository, they will have to clone all 2MB just to get this tiny project, because you accidentally added a big file. Let’s get rid of it.
First you have to find it. In this case, you already know what file it is. But suppose you didn’t; how would you identify what file or files were taking up so much space? If you run git gc, all the objects are in a packfile; you can identify the big objects by running another plumbing command called git verify-pack and sorting on the third field in the output, which is file size. You can also pipe it through the tailcommand because you’re only interested in the last few largest files:
$ git verify-pack -v .git/objects/pack/pack-3f8c0...bb.idx | sort -k 3 -n | tail -3
e3f094f522629ae358806b17daf78246c27c007b blob   1486 734 4667
05408d195263d853f09dca71d55116663690c27c blob   12908 3478 1189
7a9eb2fba2b1811321254ac360970fc169ba2330 blob   2056716 2056872 5401
The big object is at the bottom: 2MB. To find out what file it is, you’ll use the rev-list command, which you used briefly in Chapter 7. If you pass --objects to rev-list, it lists all the commit SHAs and also the blob SHAs with the file paths associated with them. You can use this to find your blob’s name:
$ git rev-list --objects --all | grep 7a9eb2fb
7a9eb2fba2b1811321254ac360970fc169ba2330 git.tbz2
Now, you need to remove this file from all trees in your past. You can easily see what commits modified this file:
$ git log --pretty=oneline --branches -- git.tbz2
da3f30d019005479c99eb4c3406225613985a1db oops - removed large tarball
6df764092f3e7c8f5f94cbe08ee5cf42e92a0289 added git tarball
You must rewrite all the commits downstream from 6df76 to fully remove this file from your Git history. To do so, you use filter-branch, which you used in Chapter 6:
$ git filter-branch --index-filter \
   'git rm --cached --ignore-unmatch git.tbz2' -- 6df7640^..
Rewrite 6df764092f3e7c8f5f94cbe08ee5cf42e92a0289 (1/2)rm 'git.tbz2'
Rewrite da3f30d019005479c99eb4c3406225613985a1db (2/2)
Ref 'refs/heads/master' was rewritten
The --index-filter option is similar to the --tree-filter option used in Chapter 6, except that instead of passing a command that modifies files checked out on disk, you’re modifying your staging area or index each time. Rather than remove a specific file with something like rm file, you have to remove it with git rm --cached — you must remove it from the index, not from disk. The reason to do it this way is speed — because Git doesn’t have to check out each revision to disk before running your filter, the process can be much, much faster. You can accomplish the same task with --tree-filter if you want. The --ignore-unmatch option to git rm tells it not to error out if the pattern you’re trying to remove isn’t there. Finally, you ask filter-branch to rewrite your history only from the 6df7640 commit up, because you know that is where this problem started. Otherwise, it will start from the beginning and will unnecessarily take longer.
Your history no longer contains a reference to that file. However, your reflog and a new set of refs that Git added when you did the filter-branch under .git/refs/original still do, so you have to remove them and then repack the database. You need to get rid of anything that has a pointer to those old commits before you repack:
$ rm -Rf .git/refs/original
$ rm -Rf .git/logs/
$ git gc
Counting objects: 19, done.
Delta compression using 2 threads.
Compressing objects: 100% (14/14), done.
Writing objects: 100% (19/19), done.
Total 19 (delta 3), reused 16 (delta 1)
Let’s see how much space you saved.
$ git count-objects -v
count: 8
size: 2040
in-pack: 19
packs: 1
size-pack: 7
prune-packable: 0
garbage: 0
The packed repository size is down to 7K, which is much better than 2MB. You can see from the size value that the big object is still in your loose objects, so it’s not gone; but it won’t be transferred on a push or subsequent clone, which is what is important. If you really wanted to, you could remove the object completely by running git prune --expire.

9.6 Git Internals - Transfer Protocols

9.6 Git Internals - Transfer Protocols

Transfer Protocols

Git can transfer data between two repositories in two major ways: over HTTP and via the so-called smart protocols used in the file://, ssh://, and git:// transports. This section will quickly cover how these two main protocols operate.

The Dumb Protocol

Git transport over HTTP is often referred to as the dumb protocol because it requires no Git-specific code on the server side during the transport process. The fetch process is a series of GET requests, where the client can assume the layout of the Git repository on the server. Let’s follow the http-fetch process for the simplegit library:
$ git clone http://github.com/schacon/simplegit-progit.git
The first thing this command does is pull down the info/refs file. This file is written by the update-server-info command, which is why you need to enable that as a post-receive hook in order for the HTTP transport to work properly:
=> GET info/refs
ca82a6dff817ec66f44342007202690a93763949     refs/heads/master
Now you have a list of the remote references and SHAs. Next, you look for what the HEAD reference is so you know what to check out when you’re finished:
=> GET HEAD
ref: refs/heads/master
You need to check out the master branch when you’ve completed the process. At this point, you’re ready to start the walking process. Because your starting point is the ca82a6 commit object you saw in the info/refs file, you start by fetching that:
=> GET objects/ca/82a6dff817ec66f44342007202690a93763949
(179 bytes of binary data)
You get an object back — that object is in loose format on the server, and you fetched it over a static HTTP GET request. You can zlib-uncompress it, strip off the header, and look at the commit content:
$ git cat-file -p ca82a6dff817ec66f44342007202690a93763949
tree cfda3bf379e4f8dba8717dee55aab78aef7f4daf
parent 085bb3bcb608e1e8451d4b2432f8ecbe6306e7e7
author Scott Chacon <schacon@gmail.com> 1205815931 -0700
committer Scott Chacon <schacon@gmail.com> 1240030591 -0700

changed the version number
Next, you have two more objects to retrieve — cfda3b, which is the tree of content that the commit we just retrieved points to; and 085bb3, which is the parent commit:
=> GET objects/08/5bb3bcb608e1e8451d4b2432f8ecbe6306e7e7
(179 bytes of data)
That gives you your next commit object. Grab the tree object:
=> GET objects/cf/da3bf379e4f8dba8717dee55aab78aef7f4daf
(404 - Not Found)
Oops — it looks like that tree object isn’t in loose format on the server, so you get a 404 response back. There are a couple of reasons for this — the object could be in an alternate repository, or it could be in a packfile in this repository. Git checks for any listed alternates first:
=> GET objects/info/http-alternates
(empty file)
If this comes back with a list of alternate URLs, Git checks for loose files and packfiles there — this is a nice mechanism for projects that are forks of one another to share objects on disk. However, because no alternates are listed in this case, your object must be in a packfile. To see what packfiles are available on this server, you need to get the objects/info/packs file, which contains a listing of them (also generated by update-server-info):
=> GET objects/info/packs
P pack-816a9b2334da9953e530f27bcac22082a9f5b835.pack
There is only one packfile on the server, so your object is obviously in there, but you’ll check the index file to make sure. This is also useful if you have multiple packfiles on the server, so you can see which packfile contains the object you need:
=> GET objects/pack/pack-816a9b2334da9953e530f27bcac22082a9f5b835.idx
(4k of binary data)
Now that you have the packfile index, you can see if your object is in it — because the index lists the SHAs of the objects contained in the packfile and the offsets to those objects. Your object is there, so go ahead and get the whole packfile:
=> GET objects/pack/pack-816a9b2334da9953e530f27bcac22082a9f5b835.pack
(13k of binary data)
You have your tree object, so you continue walking your commits. They’re all also within the packfile you just downloaded, so you don’t have to do any more requests to your server. Git checks out a working copy of the master branch that was pointed to by the HEAD reference you downloaded at the beginning.
The entire output of this process looks like this:
$ git clone http://github.com/schacon/simplegit-progit.git
Initialized empty Git repository in /private/tmp/simplegit-progit/.git/
got ca82a6dff817ec66f44342007202690a93763949
walk ca82a6dff817ec66f44342007202690a93763949
got 085bb3bcb608e1e8451d4b2432f8ecbe6306e7e7
Getting alternates list for http://github.com/schacon/simplegit-progit.git
Getting pack list for http://github.com/schacon/simplegit-progit.git
Getting index for pack 816a9b2334da9953e530f27bcac22082a9f5b835
Getting pack 816a9b2334da9953e530f27bcac22082a9f5b835
 which contains cfda3bf379e4f8dba8717dee55aab78aef7f4daf
walk 085bb3bcb608e1e8451d4b2432f8ecbe6306e7e7
walk a11bef06a3f659402fe7563abf99ad00de2209e6

The Smart Protocol

The HTTP method is simple but a bit inefficient. Using smart protocols is a more common method of transferring data. These protocols have a process on the remote end that is intelligent about Git — it can read local data and figure out what the client has or needs and generate custom data for it. There are two sets of processes for transferring data: a pair for uploading data and a pair for downloading data.

Uploading Data

To upload data to a remote process, Git uses the send-pack and receive-pack processes. The send-pack process runs on the client and connects to a receive-pack process on the remote side.
For example, say you run git push origin master in your project, and origin is defined as a URL that uses the SSH protocol. Git fires up the send-pack process, which initiates a connection over SSH to your server. It tries to run a command on the remote server via an SSH call that looks something like this:
$ ssh -x git@github.com "git-receive-pack 'schacon/simplegit-progit.git'"
005bca82a6dff817ec66f4437202690a93763949 refs/heads/master report-status delete-refs
003e085bb3bcb608e1e84b2432f8ecbe6306e7e7 refs/heads/topic
0000
The git-receive-pack command immediately responds with one line for each reference it currently has — in this case, just the master branch and its SHA. The first line also has a list of the server’s capabilities (here, report-status and delete-refs).
Each line starts with a 4-byte hex value specifying how long the rest of the line is. Your first line starts with 005b, which is 91 in hex, meaning that 91 bytes remain on that line. The next line starts with 003e, which is 62, so you read the remaining 62 bytes. The next line is 0000, meaning the server is done with its references listing.
Now that it knows the server’s state, your send-pack process determines what commits it has that the server doesn’t. For each reference that this push will update, the send-pack process tells the receive-pack process that information. For instance, if you’re updating the master branch and adding an experiment branch, the send-pack response may look something like this:
0085ca82a6dff817ec66f44342007202690a93763949  15027957951b64cf874c3557a0f3547bd83b3ff6 refs/heads/master report-status
00670000000000000000000000000000000000000000 cdfdb42577e2506715f8cfeacdbabc092bf63e8d refs/heads/experiment
0000
The SHA-1 value of all '0's means that nothing was there before — because you’re adding the experiment reference. If you were deleting a reference, you would see the opposite: all '0's on the right side.
Git sends a line for each reference you’re updating with the old SHA, the new SHA, and the reference that is being updated. The first line also has the client’s capabilities. Next, the client uploads a packfile of all the objects the server doesn’t have yet. Finally, the server responds with a success (or failure) indication:
000Aunpack ok

Downloading Data

When you download data, the fetch-pack and upload-pack processes are involved. The client initiates a fetch-pack process that connects to an upload-pack process on the remote side to negotiate what data will be transferred down.
There are different ways to initiate the upload-pack process on the remote repository. You can run via SSH in the same manner as the receive-pack process. You can also initiate the process via the Git daemon, which listens on a server on port 9418 by default. The fetch-pack process sends data that looks like this to the daemon after connecting:
003fgit-upload-pack schacon/simplegit-progit.git\0host=myserver.com\0
It starts with the 4 bytes specifying how much data is following, then the command to run followed by a null byte, and then the server’s hostname followed by a final null byte. The Git daemon checks that the command can be run and that the repository exists and has public permissions. If everything is cool, it fires up the upload-pack process and hands off the request to it.
If you’re doing the fetch over SSH, fetch-pack instead runs something like this:
$ ssh -x git@github.com "git-upload-pack 'schacon/simplegit-progit.git'"
In either case, after fetch-pack connects, upload-pack sends back something like this:
0088ca82a6dff817ec66f44342007202690a93763949 HEAD\0multi_ack thin-pack \
  side-band side-band-64k ofs-delta shallow no-progress include-tag
003fca82a6dff817ec66f44342007202690a93763949 refs/heads/master
003e085bb3bcb608e1e8451d4b2432f8ecbe6306e7e7 refs/heads/topic
0000
This is very similar to what receive-pack responds with, but the capabilities are different. In addition, it sends back the HEAD reference so the client knows what to check out if this is a clone.
At this point, the fetch-pack process looks at what objects it has and responds with the objects that it needs by sending "want" and then the SHA it wants. It sends all the objects it already has with "have" and then the SHA. At the end of this list, it writes "done" to initiate the upload-pack process to begin sending the packfile of the data it needs:
0054want ca82a6dff817ec66f44342007202690a93763949 ofs-delta
0032have 085bb3bcb608e1e8451d4b2432f8ecbe6306e7e7
0000
0009done
That is a very basic case of the transfer protocols. In more complex cases, the client supports multi_ackor side-band capabilities; but this example shows you the basic back and forth used by the smart protocol processes.

9.5 Git Internals - The Refspec

9.5 Git Internals - The Refspec

The Refspec

Throughout this book, you’ve used simple mappings from remote branches to local references; but they can be more complex. Suppose you add a remote like this:
$ git remote add origin git@github.com:schacon/simplegit-progit.git
It adds a section to your .git/config file, specifying the name of the remote (origin), the URL of the remote repository, and the refspec for fetching:
[remote "origin"]
       url = git@github.com:schacon/simplegit-progit.git
       fetch = +refs/heads/*:refs/remotes/origin/*
The format of the refspec is an optional +, followed by <src>:<dst>, where <src> is the pattern for references on the remote side and <dst> is where those references will be written locally. The + tells Git to update the reference even if it isn’t a fast-forward.
In the default case that is automatically written by a git remote add command, Git fetches all the references under refs/heads/ on the server and writes them to refs/remotes/origin/ locally. So, if there is a master branch on the server, you can access the log of that branch locally via
$ git log origin/master
$ git log remotes/origin/master
$ git log refs/remotes/origin/master
They’re all equivalent, because Git expands each of them to refs/remotes/origin/master.
If you want Git instead to pull down only the master branch each time, and not every other branch on the remote server, you can change the fetch line to
fetch = +refs/heads/master:refs/remotes/origin/master
This is just the default refspec for git fetch for that remote. If you want to do something one time, you can specify the refspec on the command line, too. To pull the master branch on the remote down to origin/mymaster locally, you can run
$ git fetch origin master:refs/remotes/origin/mymaster
You can also specify multiple refspecs. On the command line, you can pull down several branches like so:
$ git fetch origin master:refs/remotes/origin/mymaster \
   topic:refs/remotes/origin/topic
From git@github.com:schacon/simplegit
 ! [rejected]        master     -> origin/mymaster  (non fast forward)
 * [new branch]      topic      -> origin/topic
In this case, the master branch pull was rejected because it wasn’t a fast-forward reference. You can override that by specifying the + in front of the refspec.
You can also specify multiple refspecs for fetching in your configuration file. If you want to always fetch the master and experiment branches, add two lines:
[remote "origin"]
       url = git@github.com:schacon/simplegit-progit.git
       fetch = +refs/heads/master:refs/remotes/origin/master
       fetch = +refs/heads/experiment:refs/remotes/origin/experiment
You can’t use partial globs in the pattern, so this would be invalid:
fetch = +refs/heads/qa*:refs/remotes/origin/qa*
However, you can use namespacing to accomplish something like that. If you have a QA team that pushes a series of branches, and you want to get the master branch and any of the QA team’s branches but nothing else, you can use a config section like this:
[remote "origin"]
       url = git@github.com:schacon/simplegit-progit.git
       fetch = +refs/heads/master:refs/remotes/origin/master
       fetch = +refs/heads/qa/*:refs/remotes/origin/qa/*
If you have a complex workflow process that has a QA team pushing branches, developers pushing branches, and integration teams pushing and collaborating on remote branches, you can namespace them easily this way.

Pushing Refspecs

It’s nice that you can fetch namespaced references that way, but how does the QA team get their branches into a qa/ namespace in the first place? You accomplish that by using refspecs to push.
If the QA team wants to push their master branch to qa/master on the remote server, they can run
$ git push origin master:refs/heads/qa/master
If they want Git to do that automatically each time they run git push origin, they can add a pushvalue to their config file:
[remote "origin"]
       url = git@github.com:schacon/simplegit-progit.git
       fetch = +refs/heads/*:refs/remotes/origin/*
       push = refs/heads/master:refs/heads/qa/master
Again, this will cause a git push origin to push the local master branch to the remote qa/masterbranch by default.

Deleting References

You can also use the refspec to delete references from the remote server by running something like this:
$ git push origin :topic
Because the refspec is <src>:<dst>, by leaving off the <src> part, this basically says to make the topic branch on the remote nothing, which deletes it.

Laravel

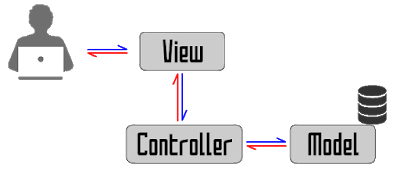
  Laravel Framework คือ PHP Framework ตัวหนึ่งที่ถูกออกแบบมาเพื่อพัฒนาเว็บแอพพลิเคชั่นต่างๆ ในรูปแบบ MVC (Model Views Controller) ซึ่งมีการแ...